Splunk Deployment Best Practice
In this blog post, I will introduce the Splunk Deployment Server and give some best practice recommendations for apps and server class structure. I already see a lot of Splunk deployments with a terrible app and server class structure, which makes it very difficult to manage the Splunk infrastructure. Therefore, I decided to write this blog post.
A Splunk deployment server is used for distribution of content and configurations. With a Splunk deployment server and a good apps / server class structure, it can be easy to manage thousands of Splunk instances. The main focus of a Splunk deployment server is to manage the configurations of Universal Forwarder (UF) and Heavy Forwarder (HF). Even though a deployment server can used to manage any Splunk instance. Splunk instances, which are remotely managed by a deployment server, are called deployment clients. The deployment clients are configured by the deployment server using deployment apps and server classes. A deployment app is a set of configurations. It can contain only a single configuration file such as inputs.conf or multiple configuration files. A server class is a group of deployment clients, which share the same characteristics. For example, a group of linux universal forwarder collecting the logs of /var/log/messages can be configured using a single server class.
Best practice for deployment apps and server class structure are to keep the amount of configurations in a single deployment app as low as possible. Subsequently, use a server class with different combinations of deployment apps to easily manage your Splunk infrastructure.
The goal of this tutorial is to manage remotely the configuration of a single Universal Forwarder (it could be also 1000 without a problem), which should collect the logs of /var/log/messages and /var/log/secure. The logs needs to be forwarded to a Splunk Indexer and furthermore, the management port should be disabled for security purpose.
We will use the following Splunk deployment apps:
- lab_inputs_linux_messages: contains an inputs.conf configuration for monitor /var/log/messages
- lab_inputs_linux_secure: contains an inputs.conf configuration for monitor /var/log/secure
- lab_outputs: contains a outputs.conf configuration to forward the data to an indexer
- lab_disable_management_port: contains a server.conf configuration to disable the management port of an universal forwarder.
These apps are combined to a single server class called lab_universal_forwarder, which is a class for all deployment clients sharing the characteristics:
- monitor /var/log/messages and /var/log/secure
- Forward it to a specific indexer
- Disable management port
That was enough theory, let’s start to configure Splunk.
Prepare the Splunk deployment server
Every Splunk Enterprise instance can be configured to be a deployment server. I recommend to have one dedicated deployment server (if you don’t have other constraints, which doesn’t allow it). In order to configure a deployment server, you simply need to put some apps under /opt/splunk/etc/deplyoment-apps/ . The minimal structure needed for an Splunk app is a folder with the name of the app in /opt/splunk/etc/deployment-apps/ and a subfolder with the name local or default (for an own app, I recommend local):
mkdir lab_inputs_linux_messages
mkdir lab_inputs_linux_messages/local
Subsequently, an inputs.conf configuration is configured in …/lab_inputs_linux_messages/local/inputs.conf with the content:
[monitor:///var/log]
index = unix
whitelist=(messages)
disabled = 0
Additionally, we will copy the existing created Splunk app:
cp -R lab_inputs_linux_messages/ lab_inputs_linux_secureAnd then change the inputs.conf configuration under …/lab_inputs_linux_secure/local/inputs.conf with the content:
[monitor:///var/log]
index = unix
whitelist=(secure)
disabled = 0
Furthermore, an outputs.conf configuration is needed. We want to keep the Splunk app configuration as small as possible, therefore we will create a separate Splunk app for it:
mkdir lab_outputs
mkdir lab_outputs/local
We will add the outputs.conf configuration under …/lab_outputs/local/outputs.conf with the content:
[tcpout]
defaultGroup=indexer

[tcpout:indexer]
server=10.10.1.7:9997
Finally, we will create a separate Splunk app for disabling the management port:
mkdir lab_disable_management_port
mkdir lab_disable_management_port/local
For disabling the management port, a server.conf configuration is needed under lab_disable_management_port/local/server.conf :
[httpServer]
disableDefaultPort = true
After preparing the deployment server, we will install an Splunk UF and configure it that it is a deployment client.
Install and Configure Universal Forwarder
In the first step, we will download the newest Splunk Universal Forwarder rpm with wget:
wget -O splunkforwarder-7.2.5-088f49762779-linux-2.6-x86_64.rpm 'https://www.splunk.com/bin/splunk/DownloadActivityServlet?architecture=x86_64&platform=linux&version=7.2.5&product=universalforwarder&filename=splunkforwarder-7.2.5-088f49762779-linux-2.6-x86_64.rpm&wget=true'Afterwards, we will install the Splunk UF:
sudo rpm -i splunkforwarder-7.2.5-088f49762779-linux-2.6-x86_64.rpm We planned to collect the logs from /var/log/messages and /var/log/secure, hence we need to change the permissions for these files to make it readable by the splunk user:
setfacl -m g:splunk:r /var/log/messages
setfacl -m g:splunk:r /var/log/secure
Additionally, a small configuration is needed, that the Splunk UF knows which deployment server needs to be connected for its configurations. Therefore, a deploymentclient.conf configuration is needed, which is stored in /opt/splunkforwarder/etc/system/local/deploymentclient.conf (for an enterprise deployment, I recommend to put it into a separate Splunk App):
vim /opt/splunkforwarder/etc/system/local/deploymentclient.confThe deploymentclient.conf consists of the following configuration:
[deployment-client]

[target-broker:deploymentServer]
targetUri= 10.10.1.7:8089
Afterwards, we start Splunk, accept the license text and create an admin user:
/opt/splunkforwarder/bin/splunk startAfter a short time, the Splunk UF is connecting to the deployment server and we can see it by clicking on Settings/Forwarder management :

We create a new server class with the name lab_universal_forwarder:

Then, we click on Add Apps :

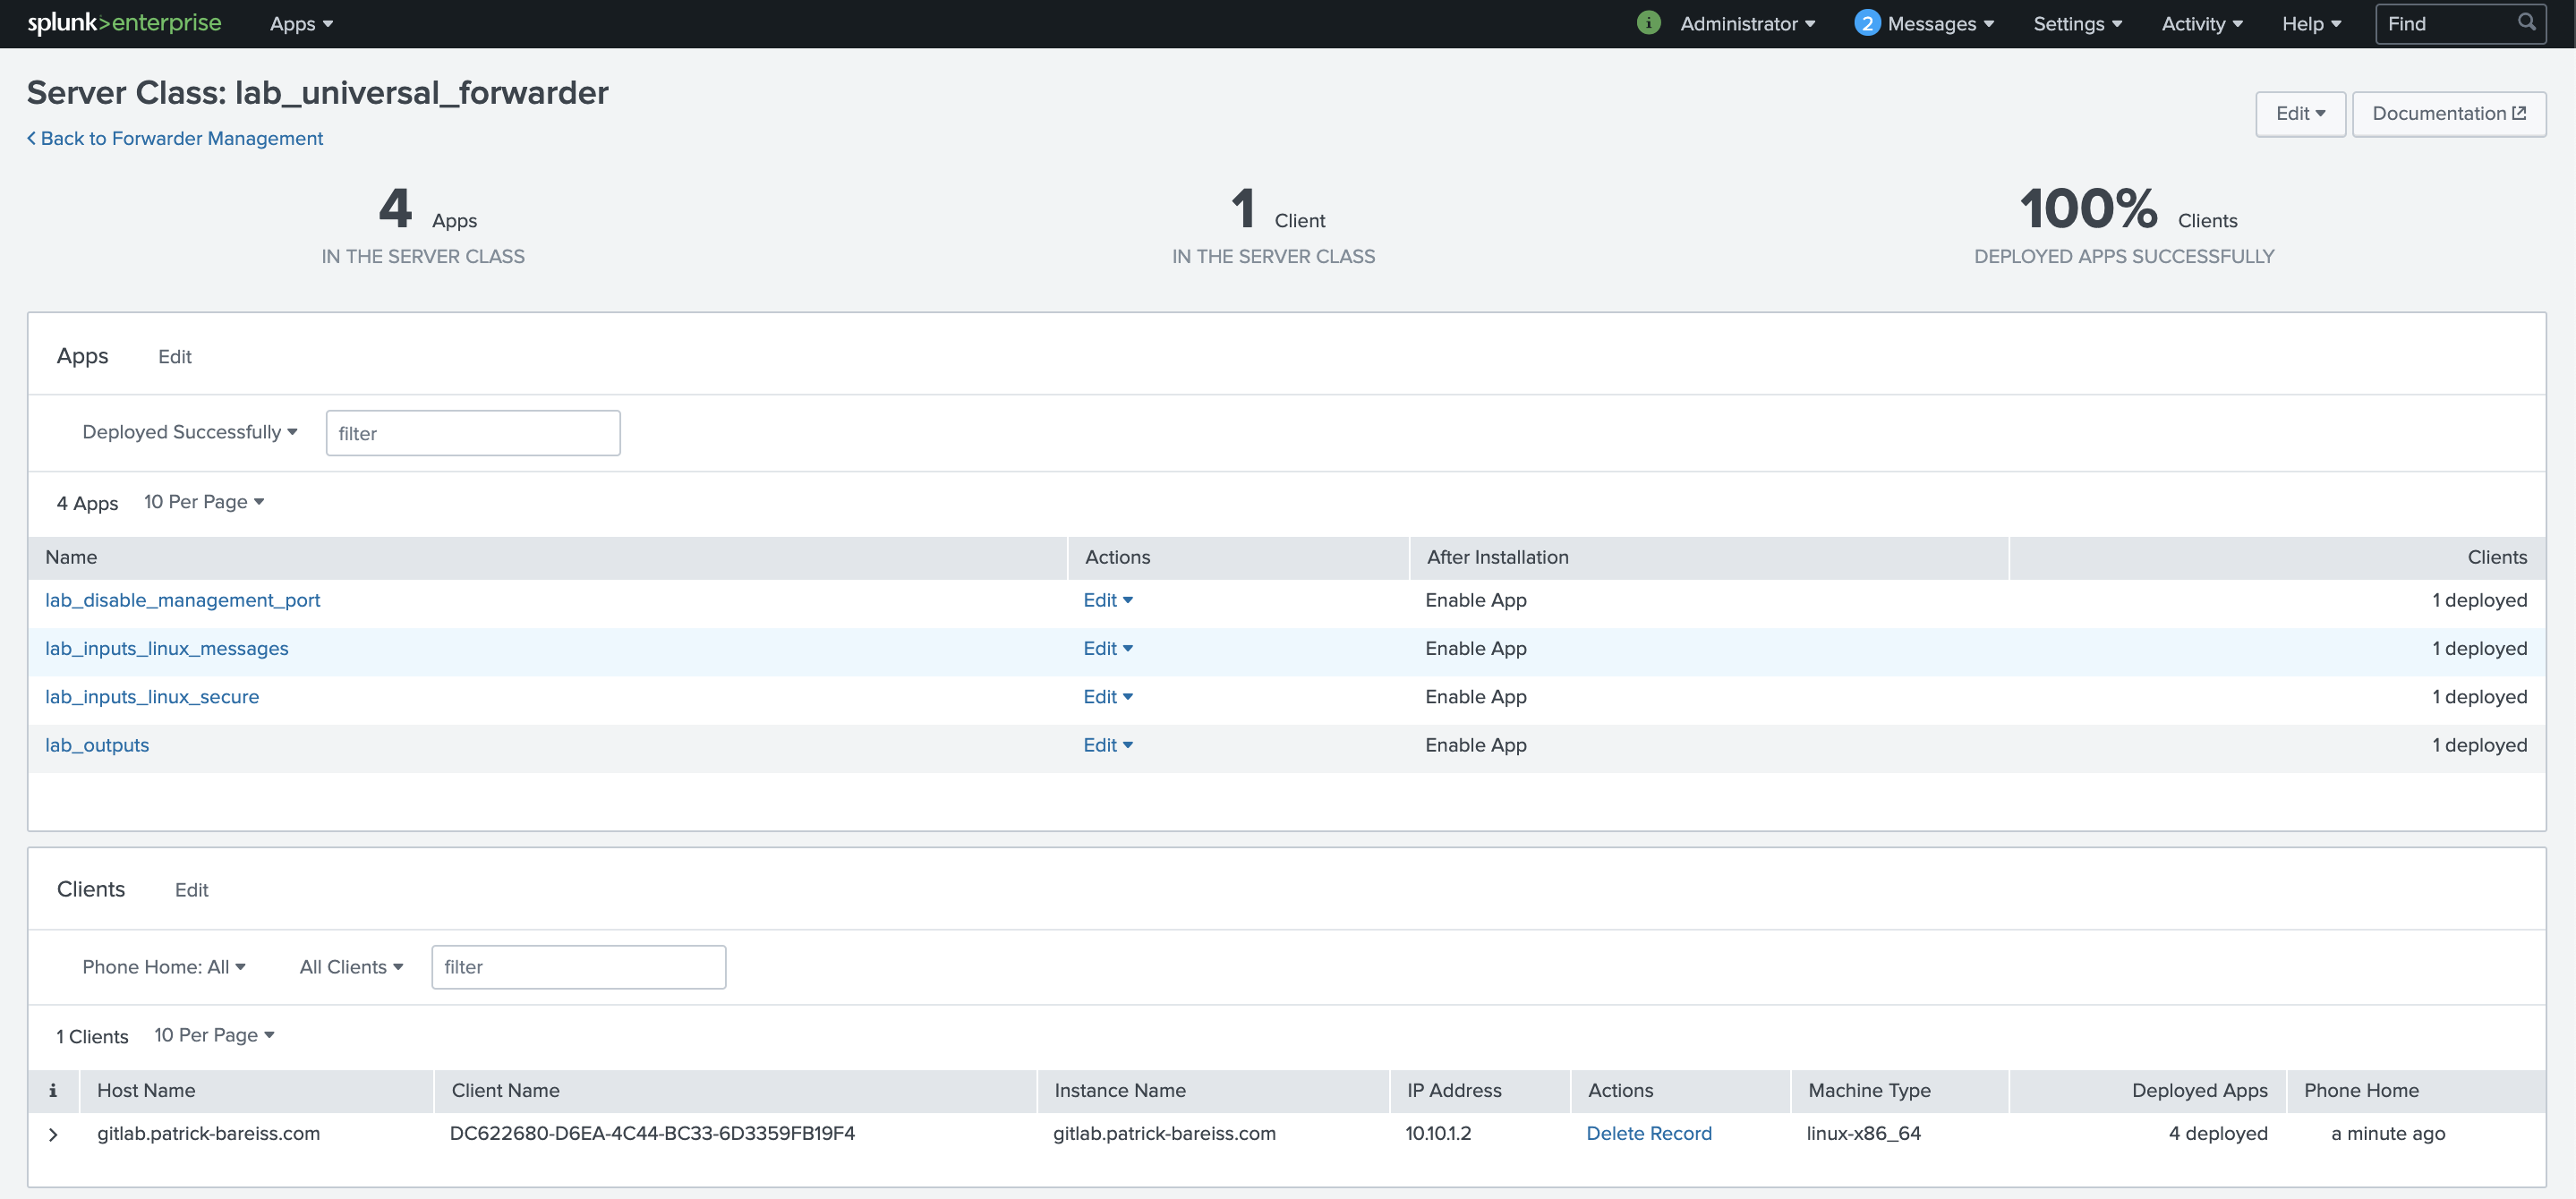
We click on the apps lab_inputs_linux_messages, lab_inputs_linux_secure, lab_outputs and lab_disable_managment_port. Then click on Save :

Then, we click on Add Clients to connect deployment clients to a server class:

We add the IP Address in the Include text field. Afterwards, we click on preview and verify that the Matched column contains a check mark. Then, we click on Save :

The new server class lab_universal_forwarder is configured successfully. The deployment clients are polling for changes. Then, the configuration is downloaded by the deployment clients, which are part of this server class. In this example, only a single deployment client is part of the server class. But it would be not more time consuming to configure hundreds or thousands of deployment clients with this server class.

We verify our configuration by performing a search, if the needed logs are indexed:

Thank you for reading. If that helped you to improve your Splunk infrastructure, leave a comment.